What is WordPress?
WordPress is the most widely used open-source Content Management System (CMS), powering millions of websites and blogs worldwide. Its flexibility, ease of use, and huge plugin ecosystem make it the first choice for beginners as well as professionals.
On the other hand, Amazon Web Services (AWS) provides reliable and scalable cloud infrastructure. By hosting WordPress on an EC2 instance, you get full control over your website, better performance, and the ability to scale as your traffic grows.
In this guide, we’ll walk you through step-by-step instructions to create and host a WordPress website on AWS EC2 from scratch, covering both the theoretical concepts and the practical hands-on setup.
EC2 vs Shared Hosting
- Shared Hosting/Managed WordPress – Easy to start but limited in customization, scalability, and control.
- AWS EC2 – Full control over server, scalable resources, higher security, and pay-as-you-go pricing.
👉 If you want flexibility and growth, EC2 is the better choice.
🖥️ Understanding EC2
What is an EC2 Instance?
An EC2 instance is a virtual server on Amazon Web Services (AWS) that allows you to run applications just like a physical machine. It gives you the flexibility to choose your operating system, configure software, and scale resources based on your needs.
Key Components of EC2:
- AMI (Amazon Machine Image): A pre-configured template that defines the operating system and software for your instance.
- Instance Type: The hardware configuration (CPU, memory, storage) you select for your server.
- Security Groups: Virtual firewalls that control inbound and outbound traffic to your instance.
- Key Pairs: Used for secure login to your server via SSH.
That’s the reason EC2 is ideal for hosting WordPress because it offers full control over the server, scalability to handle increasing website traffic, and flexibility to install and configure any software you need. With its pay-as-you-go pricing, it’s also cost-efficient for beginners and businesses alike.
Web Hosting Basics
How WordPress Works:
- Web Server (Apache/Nginx): Handles requests from users’ browsers and delivers website content.
- PHP: The programming language WordPress is built on — it processes the WordPress code and generates dynamic content.
- Database (MySQL/MariaDB): Stores all your website data, including posts, pages, users, and settings.
- WordPress Core Files: Provide the CMS functionality (themes, plugins, admin panel, etc.) that interact with PHP and the database.
- Browser Display: The web server sends the processed content back to the user’s browser as a fully rendered website.
Relation Between EC2, Web Server, Database, and PHP
- EC2 hosts your WordPress setup.
- Apache/Nginx serves your website content.
- PHP processes your WordPress code.
- MySQL/MariaDB stores all your site data.
Concept of Elastic IP
Since EC2 uses a dynamic IP, the address changes on restart.
Using an Elastic IP gives your site a fixed, permanent IP so visitors can always access it.
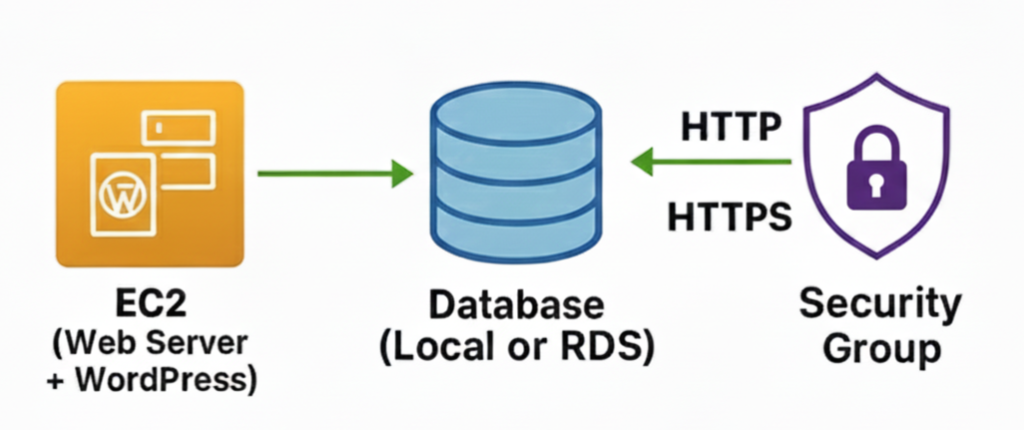
Architecture Overview
This architecture shows how WordPress can be hosted on an EC2 instance with a connected database (either local or Amazon RDS) and protected by a Security Group for secure HTTP/HTTPS access.
Step-by-Step Implementation
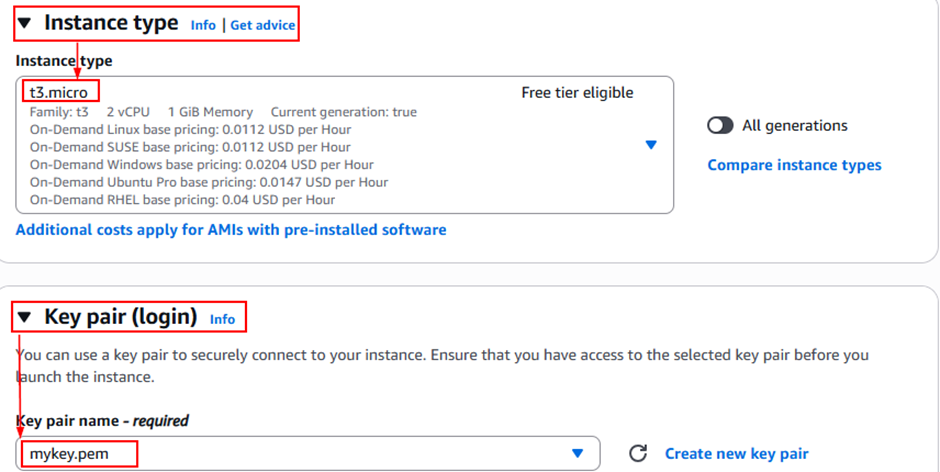
Step 1: Launch an EC2 Instance
- Select the AMI – Ubuntu Server

- Select the Type: t3.micro (Free Tier)
- Key pair: create & download mykey.pem
- In the Network settings– create a new security group and check all options – Allow SSH traffic, Allow HTTPS traffic, and Allow HTTP traffic from the internet.
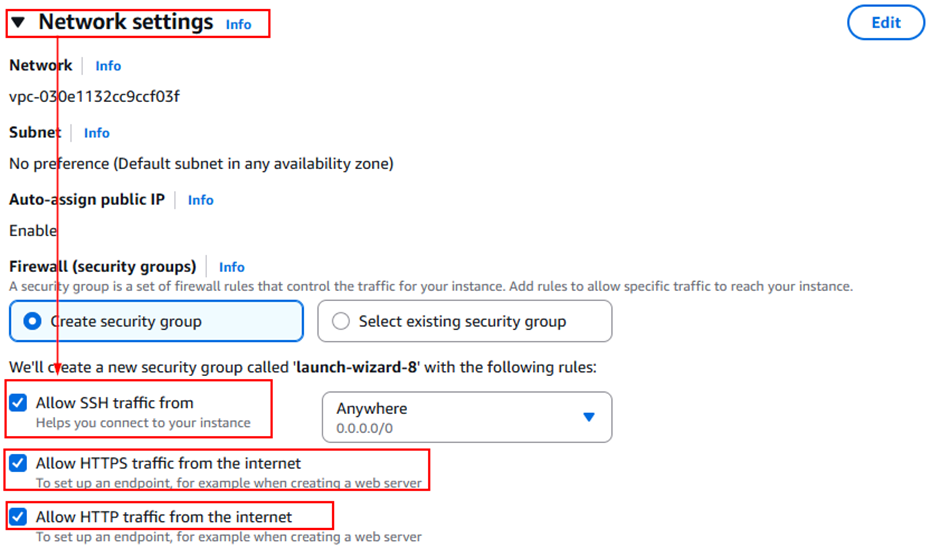
- Proceed with the default settings and launch the instance.
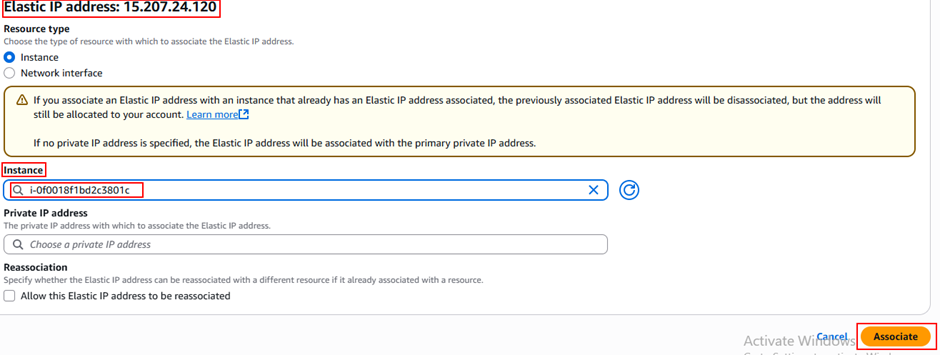
Step 2: Allocate & Associate an Elastic IP
- In the EC2 Dashboard, go to Elastic IPs → Allocate Elastic IP address.

- Choose Amazon’s pool of IPv4 addresses → click Allocate.
- Select the new IP → Actions → Associate Elastic IP.

- Pick your EC2 instance → click Associate.
- Now your EC2 has a static public IP (won’t change after reboot).
Step 3: Connect to SSH client in the EC2 dashboard
- In the EC2 Dashboard → Instances, select your instance and click Connect.

- Once connected, you will be logged into your EC2 instance’s Ubuntu server environment.
Step 4: Install Apache and MySQL
sudo apt update -y && sudo apt upgrade -y
sudo apt install apache2 -y
systemctl status apache2- Verify installation: open your browser and visit http://<Your-Elastic-IP> → you should see the Apache2 Ubuntu default page.

- Install MariaDB & Secure the installation
sudo apt install mariadb-server -y
sudo mysql_secure_installation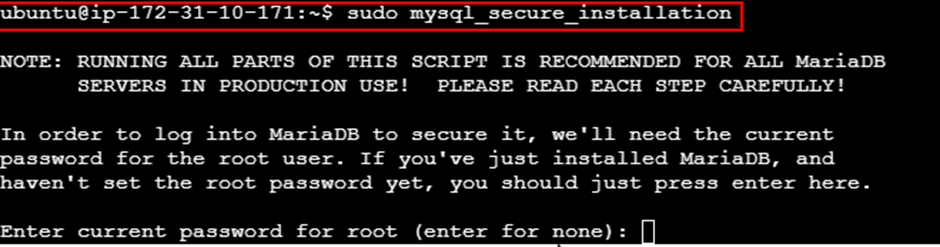
- Set a root password
- Remove anonymous users – y
- Disallow remote root login – y
- Remove test database – y
- Reload privileges tables now – y
Step 5: Install PHP and Dependencies
➤ Run the two-command given below :-
sudo apt install php php-mysql
sudo apt install php-curl php-gd php-mbstring php-xml php-xmlrpc php-soap php-intl php-zipStep 6: Configure Database
➤ Run the following commands to configure the database-
sudo su
mysql -u root -p
CREATE DATABASE wordpress_db;
CREATE USER 'wp_user'@'localhost' IDENTIFIED BY 'password';
GRANT ALL ON wordpress_db.* TO 'wp_user'@'localhost' IDENTIFIED BY 'password';
FLUSH PRIVILEGES;
EXIT;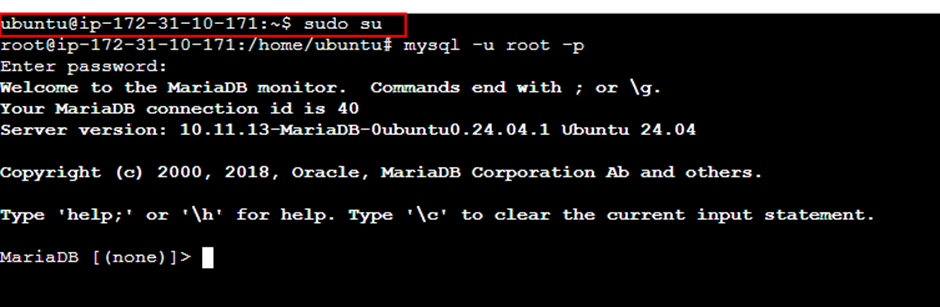
Step 7: Install the WordPress
➤ Now run the following commands to install the WordPress on your website :
cd /tmp && wget https://wordpress.org/latest.tar.gz
tar -xvf latest.tar.gz
cp -R wordpress /var/www/html/
chmod -R 755 /var/www/html/wordpress/
mkdir /var/www/html/wordpress/wp-content/uploads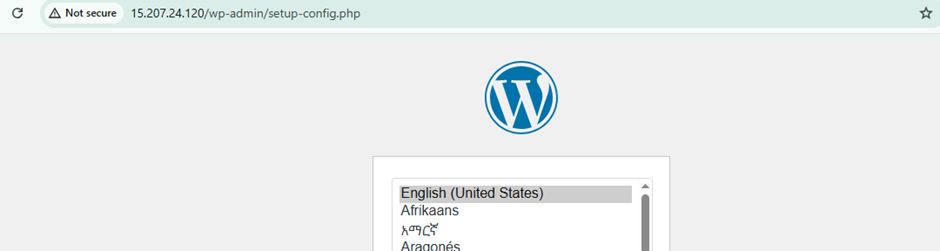
chown -R www-data:www-data /var/www/html/wordpress/wp-content/uploads/- To check Open your web browser and in search bar type – http://<your-ec2-public-ip>/wordpress.
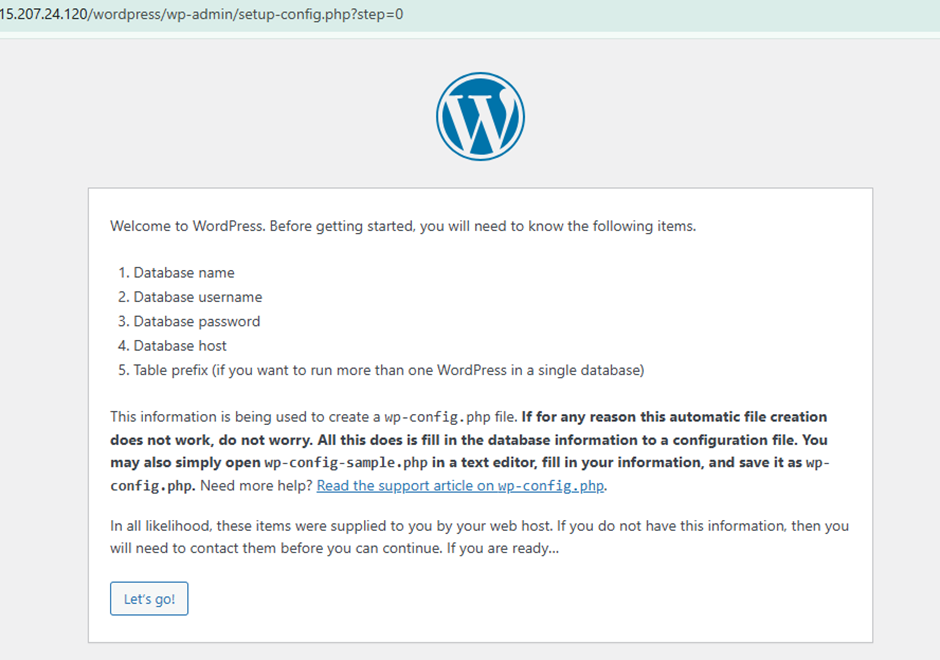
- WordPress has been successfully installed on your website.
Steps 8: To Direct WordPress Site to Public IP
By default, WordPress is set to run from a subdirectory, so we need to change the configuration to point directly to the server’s IP address for easier access.
So now we have to edit the configuration in the Apache folder to direct this by the following commands –:
cd /etc/apache2
ls
cd sites-available
ls
sudo nano 000-default.conf➤ After opening the configuration file, update the Document Root directive by adding the WordPress directory path.
DocumentRoot /var/www/html/wordpress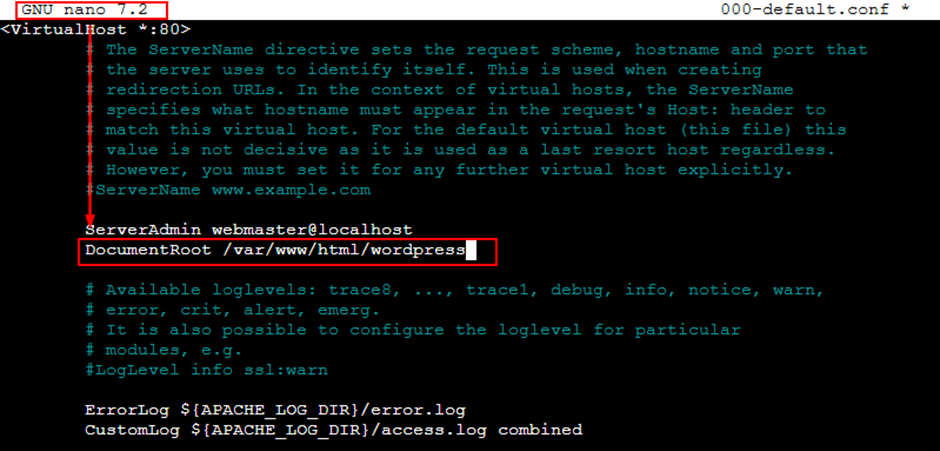
- Save& exit the file & restart the system –
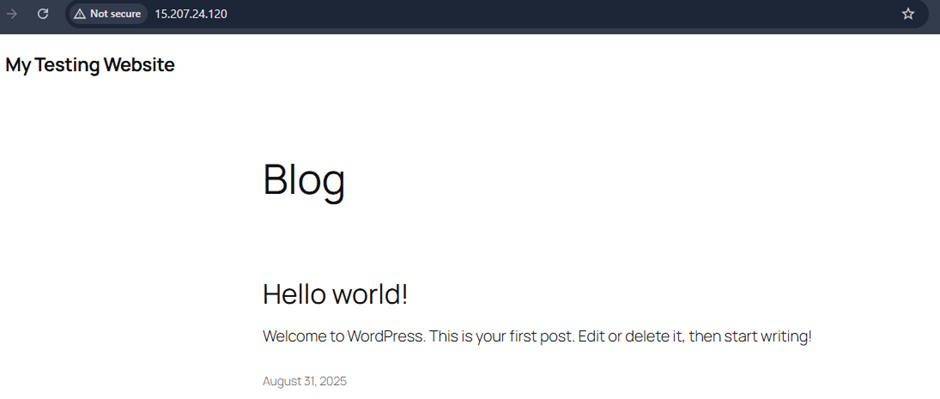
sytemctl reload apache2Now, open your browser and access your server’s IP address — the WordPress site should load directly.
Step 8: Set up the WordPress on the website
- Enter all the required information and submit.
- Run the installation.

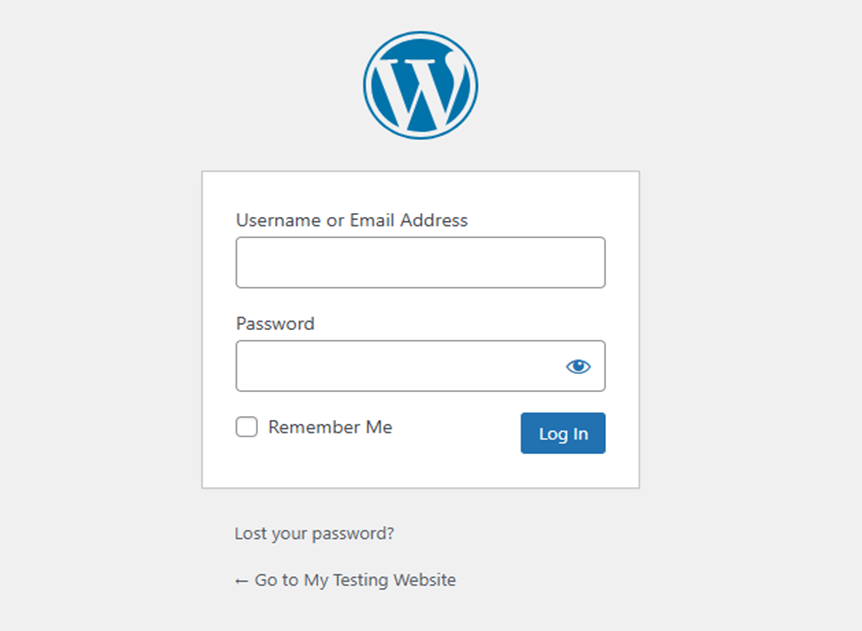
- Enter the site title, password , E-mail and the username for the site.
- Login through your credentials.
- After login in you will be directed to the dashboard where you can customise your website according to your use.

- Your website has been successfully launched.
Conclusion
Setting up WordPress on an EC2 instance gives you complete control over your website and helps you understand how cloud infrastructure works behind the scenes. By configuring it to run directly through your server’s IP address, you’ve now launched a fully functional WordPress site without the need for a domain. This hands-on approach not only builds technical confidence but also lays a strong foundation for future projects.
If you found this guide helpful, be sure to explore more tutorials and insights on my website Cloud Jiva. Stay connected for upcoming blogs where I’ll continue sharing practical steps to grow your cloud journey. 🌐✨